So it’s Friday and I haven’t published anything this week yet. Figured I’d push out a short and quick tutorial on OWIN and give everyone something to play with over the weekend!
What is Owin?
OWIN is an acronym that stands for Open Web Interface for .NET and is meant to define a standard interface between web servers and applications. The goal of OWIN is to decouple servers and applications. Due to this it encourages the development of simple modules for .NET web development. Because of this OWIN is great for building small, simple, self-hosted applications. It’s ability really shines when it comes to the creation of micro-service APIs. Within this tutorial I will take you through the basic process of creating a small self-hosted API. We will go from inception all the way to implementation and discuss possible use cases.
Possible reasons to create microapis
There seems to be a large shift in the industry lately. Most companies are moving from these huge monolithic programs to much small services that are constantly talking and much easier to maintain. These microservices are saving many companies a lot of money by cutting down on maintenance costs and time in debugging applications. Another smaller area within the microservice domain is that of microapis. These are teeny tiny APIs that do one simple and quick job, providing their own endpoints, hosting, and anything else they may need in one small package.
Maybe your company does some form of image or text processing and you want an API to handle the upload of that file? Or maybe you want a simple API for authentication or authorization? These are great examples of when to use a microapi. Remember though, just because you can, doesn’t always mean you should. You should discuss with your team and see if your specific needs can be met with this architectural style, sometimes this will work and sometimes not.
Getting set up
Before we start coding, first we need to set up a few things. Don’t worry, this won’t take long. First let’s open up and create a new console project using the .Net Framework!
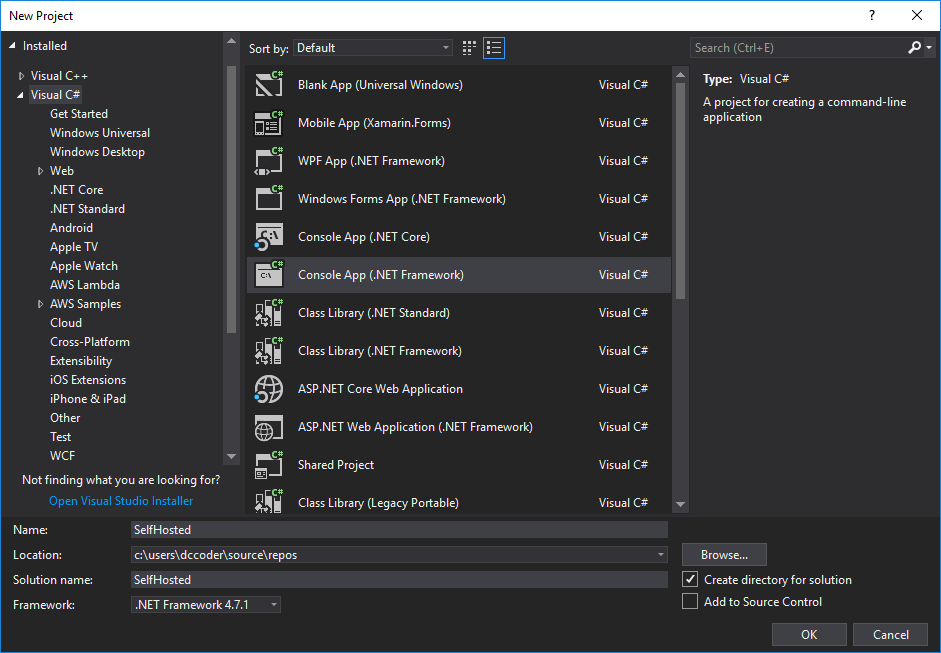
In this example I am calling mine “SelfHosted”, but you can call yours whatever you like. After we have our new project up and running we have 2 nugets to import. I’m going to use the Nuget Package Manager console to bring mine in, but you can use the “Manage” window if you like.
Run the following commands in your Nuget Package Manager Console and let it do the work.
PM> Install-Package Microsoft.Owin.SelfHost
PM> Install-Package Microsoft.AspNet.WebApi.OwinSelfHost
Now, that’s all there is to the set up! Now lets start coding our MicroAPI!
MicroAPI
Now create a new class and call it “StartUp”. This setup class is going to be what gets called to initialize our API. Here we can set things like Authorization types, Routes, and many more features! For now, however, we’re just going to leave it fairly bland and just do the bare minimum. Replace whatever is in the file “Setup.cs” with the following.
Startup
using System.Web.Http; using Owin;

namespace SelfHosted{
public class Startup{
public void Configuration(IAppBuilder app){
// Configure Web API for self-host
var config = new HttpConfiguration();
config.Routes.MapHttpRoute( name: "DefaultApi", routeTemplate: "api/{controller}/{name}", defaults: new { name = RouteParameter.Optional } );

app.UseWebApi(config);
}
}
}
For those of you that have used MVC, this may look familiar to you. All we are doing is setting up the Config engine and identifying one route for our API. For most microAPIs this is all the routes you will need. Remember, the point of being micro is to stay small!
Controller
Now, just like in MVC we are going to create a controller. This is what will actually handle our requests, do the work, and send us our feedback. Again we’re going to keep this one simple. Create another class and call it “HelloController”. Once you have it made, replace all of the code in it with the following:
[cc lang=”csharp”] using System.Collections.Generic; using System.Web.Http;
namespace SelfHosted{ public class HelloController : ApiController{ // GET api/hello public IEnumerable Get(){ return new string[] { “Hello”, “World” }; }
// GET api/hello/bob public string Get(string name){ return $”Hello, {name}!”; } } } [/cc]
Be sure to take note that we inherit from the ApiController class, this is important to remember as if you don’t it just doesn’t work. Also note that we only have “Get”s in our controller. You could just as easily place PUT, DELETE, etc types as well if you wanted to. I’m just sticking with Get for simplicity’s sake.
The program itself!
Now that we have our StartUp.cs and our HelloController.cs completed it’s time to actually make our program! In your Program.cs file, replace the contents with the following:
[cc lang=”csharp”] using System; using Microsoft.Owin.Hosting;
namespace SelfHosted{ class Program{ static void Main(string[] args){ using (WebApp.Start(“http://localhost:8080”)){ Console.WriteLine(“Web Server is running.”); Console.WriteLine(“Press any key to quit.”); Console.ReadLine(); } } } } [/cc]
As you can see, we start off calling WebApp.Start, this is a command to Owin to begin everything, we pass it the type “StartUp”. The StartUp type is actually our startup class that we created earlier. It being passed in here allows for much greater flexibility. The string that is passed is the actual domain/ip and port that we want the server to listen on. Of course localhost is our machine and it is listening on port 8080. You are welcome to change the port to whatever you like as long as no other program is using it.
We next print out a few lines in the console explaining what’s going on and hold everything with a ReadLine. You don’t have to worry about it not doing anything, OWIN is running in the background at this point and is not effected by anything else going on in the Main method. If a user presses a key the program will exit (and thus shutdown Owin).
Well, now that we have everything programmed hit “Start” and let’s see it in action!
Running everything
Once you hit “Start” you should see a console popup that looks like this:

Yay! It’s working! But this isn’t very exciting. Let’s open up a browser and navigate to where we have our API listening. I’m navigating to localhost:8080/api/Hello
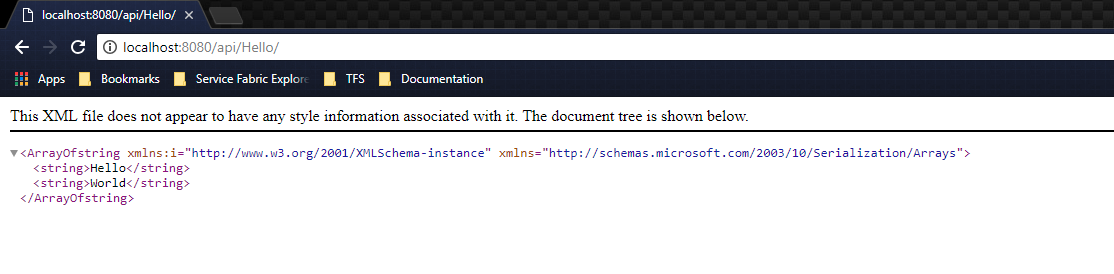
Look at that! It displays “Hello”,”World”! Just as we would have hoped! Now, let’s get a little more fancy and add a “Name” onto the end of that. I’ll put “DCCoder”.
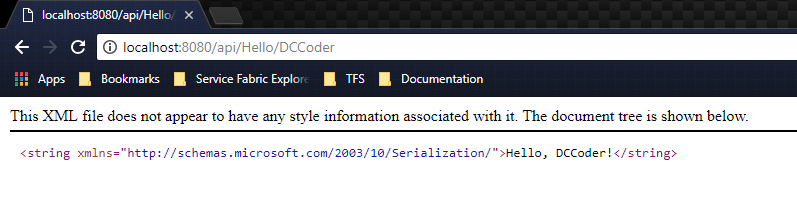
Look! There’s my name! Everything is working! I think it’s time to celebrate.
Conclusion
Throughout this tutorial I’ve walked you through the bare minimum of creating a MicroAPI and running it. When you run this (barring any firewall or router settings) you should be able to reach this from anywhere on your network with a few small tweaks (changing “localhost” to your IP Address). It should be clear just how useful this can be. Now here’s what I want you to do. Armed with this knowledge, I want you to think about a few use cases for this. What are some ways YOU would use it? Got them? Good. Now go make them! Try and turn it up a notch by adding some database interaction!